gateway

How to set up and configure PayPal for your CrowdFunding platform

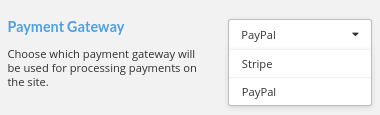
Do you want to use PayPal to accept payments on your CrowdFunding platform? If so, this tutorial will show you how to set up and configure PayPal payment gateway for your CrowdFunding instance.

PLEASE NOTE that currently you are not able to use marketplace mode when configuring the platform to be using PayPal as the payment gateway. This means that all of the donations on the platform are going into one single PayPal account. If you would like to use marketplace mode, please read this blog article.

Let’s get right into the steps!

Step 1. Go to the payment settings and choose PayPal in the dropdown

Log into your platform as a portal admin and go to the admin dashboard –> Portal Settings –> Payment Settings –> in the Payment Gateway section, choose PayPal in the dropdown.

Payment Gateway Section in Payment Settings

Step 2. Create the PayPal account

In this configuration, you will need to use a Business PayPal account to connect your account to the platform.

For this tutorial, we will be using a sandbox account in order to test the transactions without using any real money. You can also create a sandbox account if you would like to test the payments first before using a live account. You can create a sandbox account using the following URL: https://developer.paypal.com/

Step 3. Retrieve and paste the Client ID and Secret Key

Once you have created an account, you can log in and go to the accounts page. You will want to view the details for the account. Hover over the 3 dots and click on View/edit account.

Business Account

Go to the API Credentials tab for the account, then click on the Default Application link.

Click on the Default Application link

Here, you can see the Client ID and Secret Key to add in the Payment Settings in the Atlas admin dashboard.

Client ID and Secret Key

You can paste these values into the correct fields.

Step 4. Save the settings and test the payments

You can now save the Payment Settings in the admin dashboard and create a new campaign to test the transactions on the platform. When contributing, the user interface should look something like this.

If you are using a test account, you can only pledge using one of the sandbox accounts that you have. So you can go back to the accounts interface that you navigated to earlier in step 3, and click the View/edit account link for the account that you want to pledge with. If you would like, you can also create a new account to pledge with on that same page. When you click on the View/edit account button, you will see there is a Funding tab. In this funding tab, you can see the credit card information to add when making a test pledge.

Once you have made a successful pledge, be sure to check that the pledge has been captured into the correct account.

You will need to log into the account that is connected to the platform via the following link if you are testing: https://www.sandbox.paypal.com/

You should see that the pledge has been captured successfully.

PLEASE NOTE that you cannot use post charge with PayPal, so you will be capturing all donations instantly, without delays, into your PayPal account as soon as the donor makes a pledge.

That’s it, you can now accept donations via PayPal!

Tagged