In order for this test to work, you must have an approved campaign with contributions/pledges.
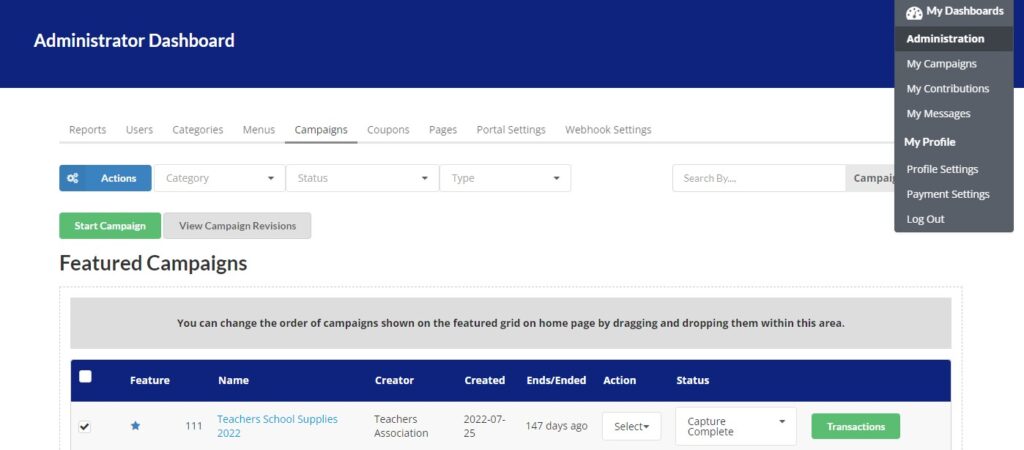
STEP 1. Log in as the Portal Admin. Go to your ‘Administrator Dashboard’ and under the ‘Campaigns’ tab, select the campaign you want to test.

Checkmark the campaigns you want to edit with the check-boxes on the left of each campaign.
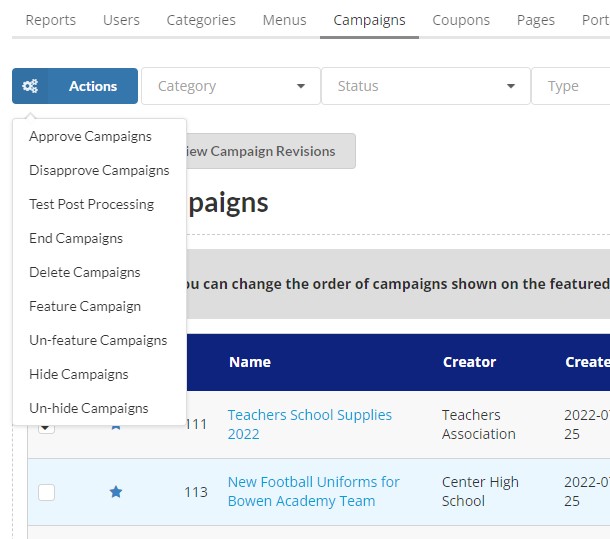
STEP 2. Click on the ‘Actions’ button at the top left to apply to the checked Campaigns. Click on ‘Test Post Processing’

- Approve Campaign: Approve campaigns which are “waiting for approval”.
- Disprove Campaign: Reject a campaign or undo campaign approval.
- Test Post Processing: End a campaign, setting end date to -7 days. This is only used to test the Stripe Post Processing Script. Click this to test pre-authorization. (Please note: In LIVE mode, there is a 5 minute delay for the contributions to be processed for testing Post Processing. If there are transfers which are declined, you need to set the campaign status to “Accepted for capture” manually as the portal admin to capture the funds.)
- End Campaigns: End a campaign by changing the campaign end date to current time ( will need to wait a couple of minutes to update ).
- Delete Campaigns: Delete a campaign.
- Feature Campaign: Feature a campaign on the front page.
- Un-feature Campaigns: Remove a campaign from the Features List.
- Hide Campaigns: Hide the campaign from /explore and front page. To access the campaign, you will need a direct link.
- Un-hide Campaigns: Show the campaign again.
STEP 3. The system will automatically process the ended campaign and you will receive email notifications for each processing stage of the campaign.

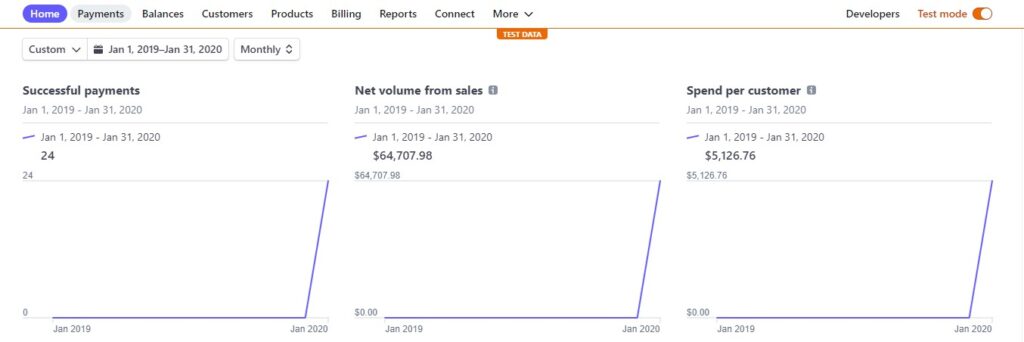
STEP 4. You will now see your transactions on your Stripe dashboard.


