Using Okta for Social Sign On

Do you want your users to sign into your Lite Tuition platform via an identity provider that they may already be using such as Facebook, LinkedIn, Google, Apple, Microsoft, and Okta? This tutorial is going to cover how to set up Okta the SSO (Social Sign On) feature on the Lite Tuition white label platform.
Okta is the identity provider service that you will need to use in order to add the identity providers as mentioned earlier. This will be mandatory to sign up for and set up if you would like to be using the other providers to sign into the platform.
Step 1. Sign up for Okta
Go to developer.okta.com to sign up for a new account. Be sure NOT to sign up for an okta.com account as the pricing for these accounts is different and will also provide a different dashboard user interface.

Step 2. Enable the Okta feature
Log into your Lite Tuition platform as a portal admin and do the following:
Go to the admin dashboard –> Portal Settings –> Website Settings –> Social Login –> Enable Social Login.
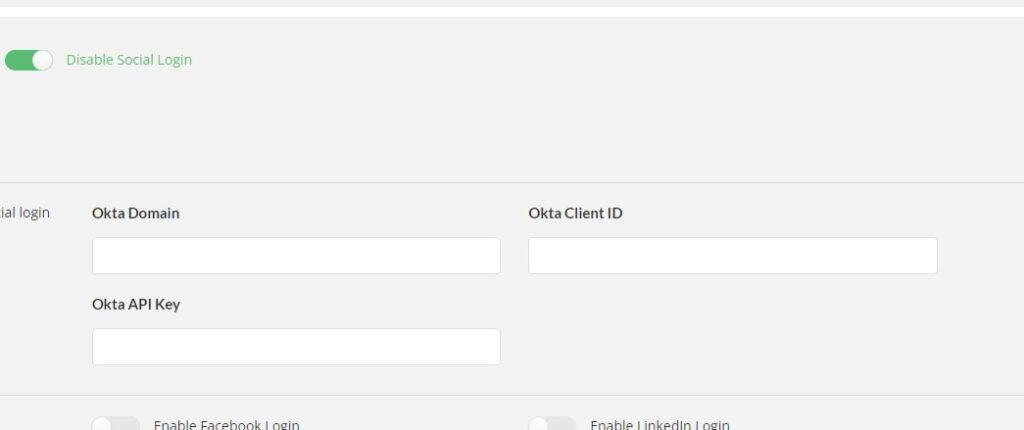
As you can see, you will need to paste information into the fields as shown above in order to connect with Okta and enable this feature.
Step 3. Create a new application on Okta
Once you have created the developer Okta account, you will need to create a new application on Okta. Simply log into Okta and go to the admin dashboard. Next, click on Applications.

Applications option in the left menu
You can create the new application by clicking on the blue Add Application button.

Add application
You will be directed to another page. On this page, click on the blue Create New App button in order to create the new app.

Create New App
You will then need to choose the type of app that you want to create. Choose Single Page App (SPA).
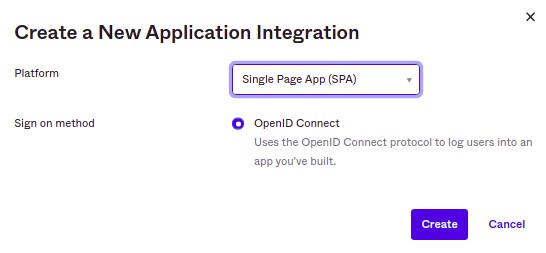
Now that you have created the new app, you will need to add the correct Login/Logout URI’s. This will be your Lite Tuition Platform URL, for example, if your platform is hosted on https://platform.litetuition.com then you should add this URL.
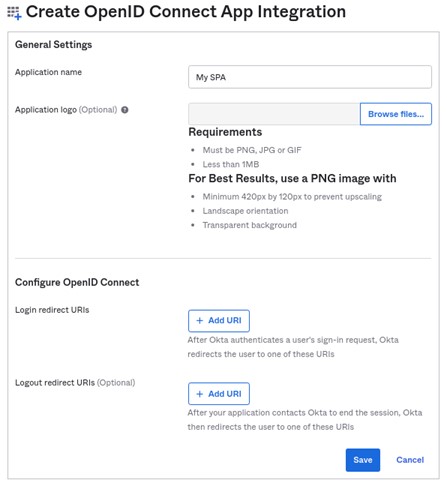
Step 4. Add the Client ID and Okta Domain into your Lite Tuition Platform
Now that you have created a new SPA, paste both the Client ID and the Okta domain into the Lite Tuition Platform social login settings.
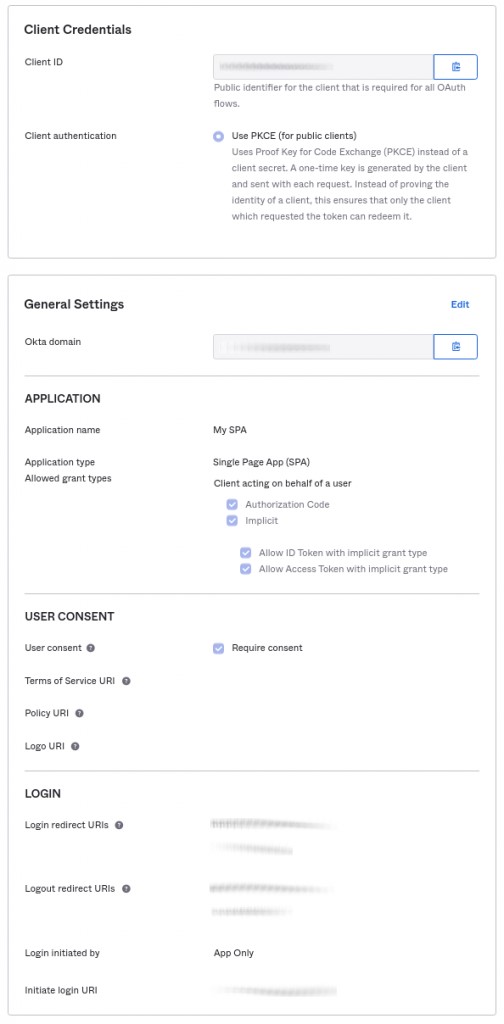
Application UI
First, you will need to copy the Client ID and paste it into the Atlas dashboard.
Once you have done that, you can then copy the Okta domain and paste it into the Atlas dashboard.
PLEASE NOTE that you will need to include https:// when pasting the Okta domain into the Lite Tuition dashboard.
Step 5. Create and paste the new API token
Now that you have the client ID and Okta domain added into the Lite Tuition dashboard, you will need to add the API token from Okta. To do this, go back to the Okta admin dashboard.
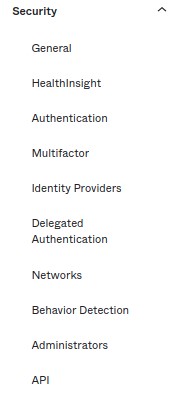
Click on the Security item in the left menu, then click on the API option.
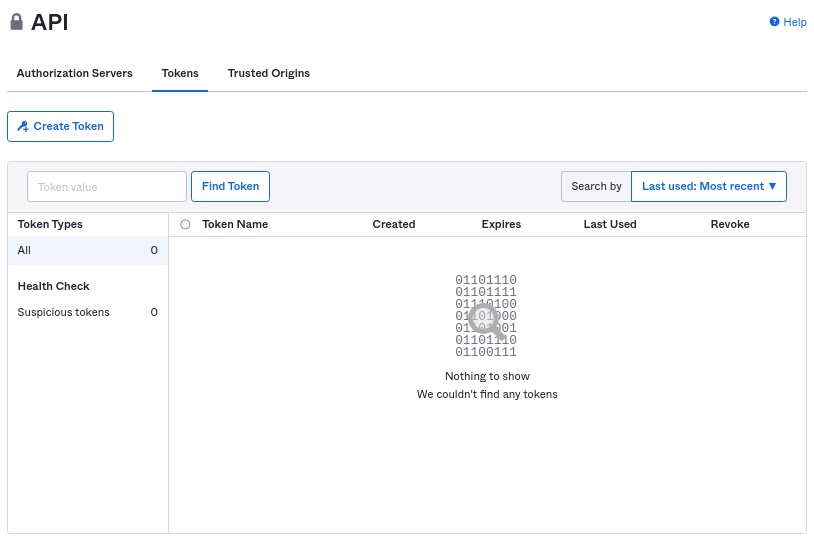
Click on the Tokens tab, then click on Create Token button.
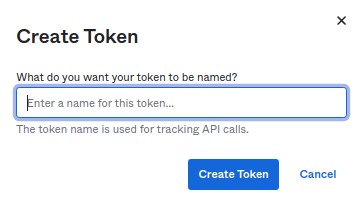
Add a name for the new token.
You will be presented with the one-time API Token. Copy this and paste it into the Lite Tuition dashboard.
PLEASE NOTE if you have a custom login URL for Okta, you will need to make sure that this custom login URL is reflected in the issuer area when going to Okta API –> Security –> API –> edit the default API (click on blue pencil icon) –> Issuer URL. If you have not created a custom URL for Okta login then this does not apply to you.
Step 6. Adding Claims
Since you are already on the API page, click on the Authorization Servers tab, then click on the edit button (blue pencil icon).
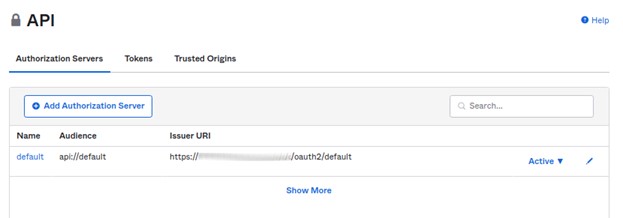
Next, click on the Claims tab, then Add Claim.

You will need to add 2 claims. The first name and the last name. Please see the below screenshots for the correct configuration.
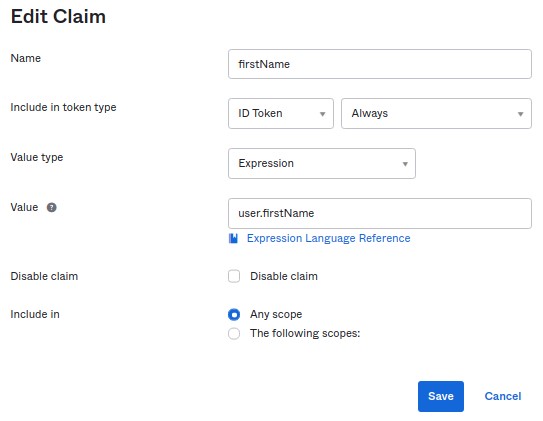
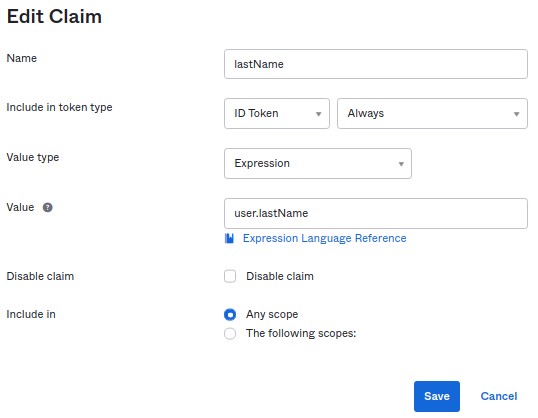
Remember to save the claims.
Step 7. Adding groups
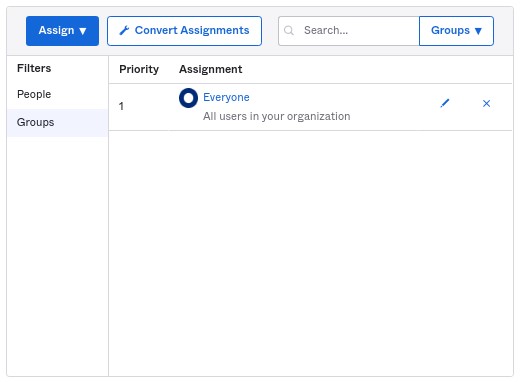
You will need to add the users that you would like Okta to be using for the app. In this example, we will be using everyone. Go back to the SPA app by clicking on the applications item, the left menu.
Then click on the assignments tab. Here you can assign users to the app.
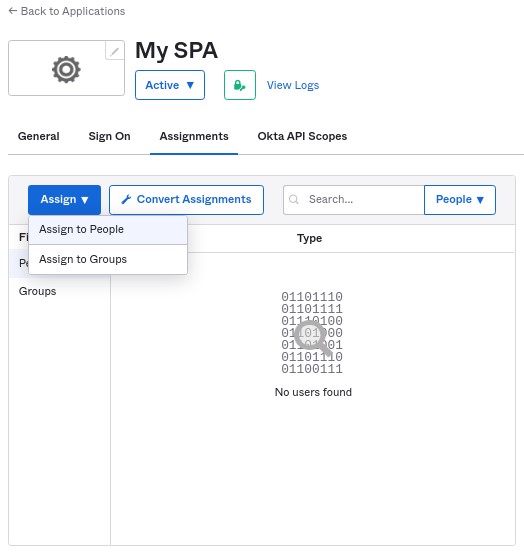
Choose Assign to Groups, then click on the Assign button to assign everyone.
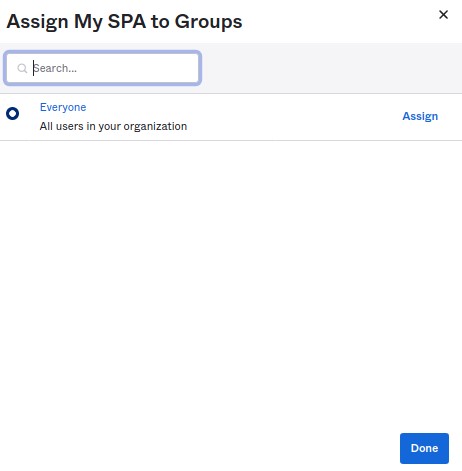
That’s it! You have now connected Okta to your platform.
Now that you have followed the above steps and have successfully connected Okta to your platform, you can try adding one of the following identity providers:

