Email Notifications and Templates
In this short tutorial, we will show how to use and adjust each email template found in the Email Notifications tab in the Administrator Dashboard.
Toggling the Email Notifications

You can toggle (using the toggle button on the right) which email notifications you want to allow. The next step will show you how to configure the message themselves.
Customizing the Email Templates
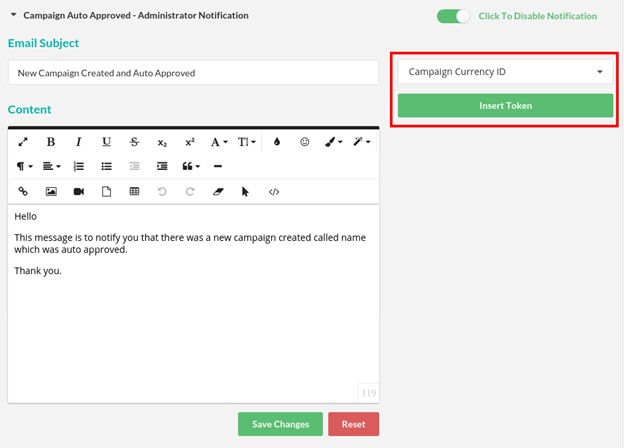
Using the built-in text editor, you can edit the content of the emails. On the top right, you’ll see the token system we’ve implemented which allows you grab details exclusive to that campaign. Just choose a value from the dropdown, and click “Insert Token”. This will insert that token in the position of your text cursor.
Check the screenshot below for the highlighted example.

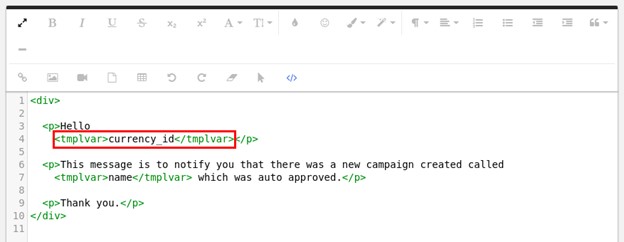
To make sure this is all working correctly please make sure to switch the froala editor to the code view (using the code view button on the toolbar) and check that your token is wrapped with <tmplvar>. Wrapping it with <tmplvar> interpolates the tokens and without this there will be issues.
Please note: You can only insert <tmplvar> through the code view.
Check screenshot below for an example.
Email Notification Table
Here is a table showing when each email notification is sent (i.e. under what conditions).
| Email Title | Sent Condition |
| Campaign Approved | When a campaign is approved manually |
| Campaign Auto Approved | When a campaign is created and automatically approved ( toggle in the settings ) |
| Campaign Cancelled By Administrator or Manager | When a campaign is cancelled |
| Campaign Currently Being Finalized | When a campaign is the Finalized step during Post Processing |
| Campaign Not Approved | When a campaign is not approved |
| Campaign Sent For Review | When a campaign is sent for review |
| Campaign Review Submitted | When a campaign is sent for review |
| Change Email Request | When an email change request is sent |
| Contact Form Submit | When the contact form has been submitted |
| Forgot Password | When a Forgot Password request has been sent |
| Inline Account Registration | When a new account has been registered |
| Campaign Pledge Direct Processing | When a pledge is made to a Direct Processing campaign |
| Campaign Pledge Post Processing | When a pledge is made to a Post Processing campaign |
| Pledge Processor – Campaign Capture Completed | When a campaign Capture process is completed |
| Pledge Processor – Campaign Capture Started | When a campaign Capture process is started |
| Pledge Processor – Campaign Finished | When a campaign has ended |
| Pledge Processor – Campaign Pre Authorization | When a campaign has passed or failed the Pre-Authorization process |
| Account Reconfirmation | When a re-confirmation email is sent to new accounts |
| Account Registration | When a confirmation email is sent to new accounts |
| Campaign Stream Update | When a campaign Stream is updated |