Domain forwarding (sometimes called connecting, pointing or redirecting) lets you automatically direct your domain’s visitors to a different location on the web. This can be done within the DNS settings of the registrar hosting your website. You can forward your domain to a site you’ve created with Wix, WordPress or any other URL.
Domain forwarding has two options: forwarding only and forwarding with masking. Both options will redirect your visitors, but forwarding with masking has additional features you can use.
Forwarding only
- Redirects visitors to a destination URL of your choosing
- Keeps the destination URL in the browser address bar
Example: Assign coolexample.com to forward only to coolwebsite.net. When a visitor types coolexample.com in a browser address bar, they will be redirected to the site for coolwebsite.net. The browser address bar will update to show coolwebsite.net.
Forwarding with masking
- Redirects visitors to a destination URL of your choosing
- Keeps your domain name in the browser address bar
- Allows you to enter meta-tags for search engine information
Example: Assign coolexample.com to forward with masking to coolwebsite.net. When a visitor types coolexample.com in a browser address bar, they will be redirected to the site for coolwebsite.net. The browser address bar will continue to show coolexample.com, effectively masking the destination URL.
This blog post will focus on switching portal to operate without any payment processing being done. Note that normally Stripe (when configured) handles all online payment processing for the portal.
Overriding to process manually is useful if you want for example to test the system out for the first time without seeing “Payment processing not setup” message or if you want to use the portal for manual (offline transactions) only.
To get started first go into Administration Panel -> Payment Settings. Then navigate to the option called “Payment Processing” and toggle it off as shown below and click “Save Payment Settings” button.
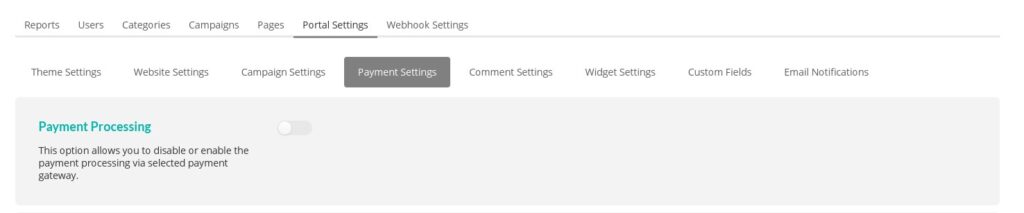
This will disable all payment processing. Now you should be able to create campaigns for testing or campaigns where you process online contributions or transactions in a different way.
Setting Per Campaign Transaction Fee
In this tutorial, we’ll show you how to set the Campaign Transaction Fee, per campaign during setup. Please note that only the ADMIN has access to this feature.
Step 1: Log in as the Admin of your portal and turn the option on in the Administrator Dashboard settings
Step 2a: Create a new campaign
During the first tab “Basics” of the campaign creation, if you scroll down you’ll see the Campaign Percentage Fee field. Here you can adjust this setting to apply exclusively for this campaign.
If this field is left blank, then the default portal Transaction Fee setting in the Payment Settings will be used instead.
Step 2b: As admin, you can also edit an existing campaign to change this percentage
Go to any campaign and hit EDIT. You’ll see the same field here.
(As admin)
Only admin can edit this field. Other users will see the number, but the field won’t be editable.
(As other users)
Step 3: Complete the campaign creation process
Just complete the campaign process and everything should be set and ready to go!
Lite Tuition Platform Quick Setup

Would you like to quickly setup your Lite Tuition white label platform? If so, this article is going to explain how to add the settings to start running your own Crowdfunding website.
If you intend to run a Crowdfunding platform for rewards and donations based Crowdfunding campaigns, you can use this article to quickly get set up and started so that you can start accepting donations. These settings can be added very fast and can be tested to make sure they are running properly.
Summary:
- Step 1. Connect your portal Stripe account – Enable the test or live mode, add the API keys (Secret key and Publishable key), and add the additional information that is needed for your specific website.
- Step 2. Add the theme settings – Go to the theme settings in the administrator dashboard, and fill out each section which is necessary for your platform.
- Step 3. Create the campaign to start accepting the donations – Configure the raise modes settings and create the campaign.
- Step 4. Donate to the campaign – Go to the campaign, and donate to it. Check your Stripe dashboard to make sure that the payment was successful.
Step 1. Connect your portal Stripe account
Once you have successfully subscribed to a plan, you will have to connect your portal Stripe account. Once you have connected your portal Stripe account, you will have the ability to accept donations on your platform. Connecting the portal Stripe account is easy, simply log into both your Stripe account and the Lite Tuition Platform as a portal administrator (you will have received the portal administrator credentials in the welcome email upon signup) to begin the process.
Go to the administrator dashboard on your Lite Tuition Platform. To do this, click on the following icon in the top right corner of the page:

Click on the “Administration” option. Then click on the “Portal Settings” button, and after, click on the “Payment Settings” tab as shown below:
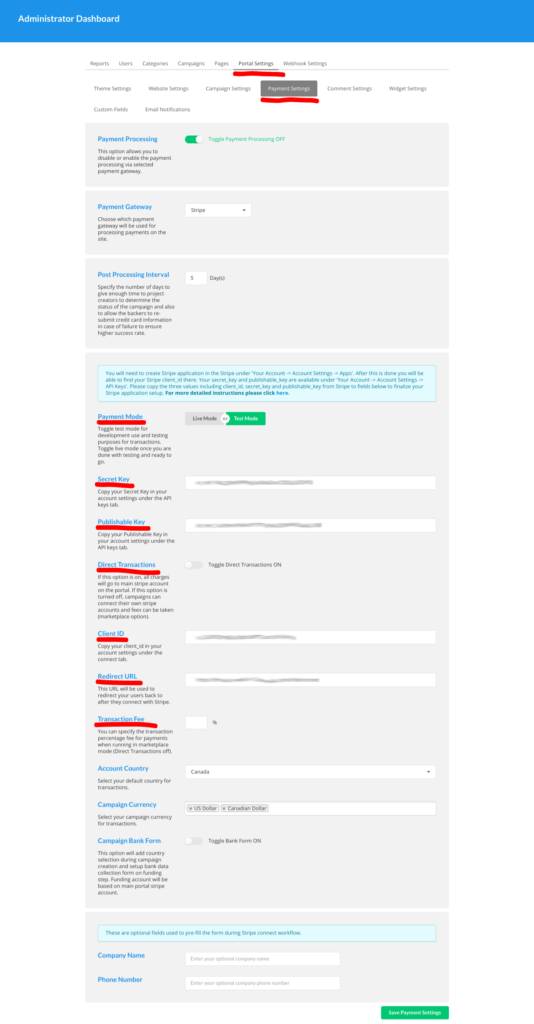
You will need to fill out the red underlined sections to connect the Stripe account.
Starting with the “Payment Mode“. There are 2 modes that you can choose from, and the next steps will dictate what you will be adding in the following fields. If you would like to test your payments without the ability to receive real donations, then you can choose “Test Mode”. If you would like to accept real donations right away and skip the testing, you can click on the “Live Mode” option.
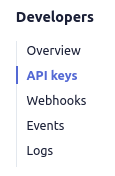
For this tutorial, we are going to be using test mode as this is recommended to make sure that the campaign is functioning correctly before accepting real donations and going live with the website. Next, you will need to add both the “Secret Key” and “Publishable Key” into the fields as shown in the above image. You can find both keys by going to the Stripe administrator dashboard and clicking on the “Developers” tab on the top right side of the screen, then click on the API keys option in the submenu.
Please note that if you set your payment settings to be using test mode, you will also have to set the toggle in the Stripe dashboard to be viewing test data.

If you are using live mode, make sure this toggle is set to view the live data. All of the keys that we are copying and pasting in this tutorial are applicable in live mode as well. All you need to do is make sure that the above toggle is set to live mode.
Once you are viewing the API keys page, you will see both the publishable key and secret key that you will need to add into the payment settings fields.
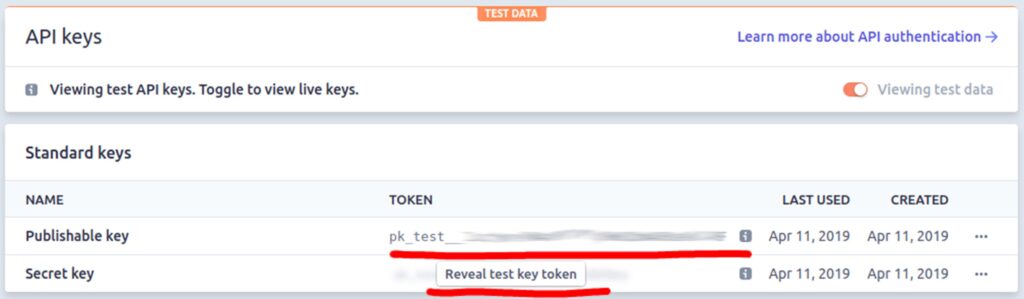
Paste both of the keys into the correct fields in the Lite Tuition payment settings page. The keys will be located as shown in the red underlined areas from the image above. Last, it is recommended to enable the direct transactions toggle.
If you enable this toggle, it will force all of the contributions to go into the Stripe account that you have just connected to the platform.
Please note: If you are using Test Mode, and decide to start accepting live donations, you will have to switch to live mode in both Lite Tuition platform, and the Stripe dashboard, and paste the new keys into the payment settings.
These are all of the credentials that you need to connect your Stripe account. You can add the additional following settings to fit your specific needs:
- Country
- Currency
- Bank form
Once you have added all of the information, click “Save Payment Settings” at the bottom of the page.
Step 2. Add the theme settings
Go to the administrator dashboard, and click on the “Portal Settings” tab, then on the “Theme Settings” option.
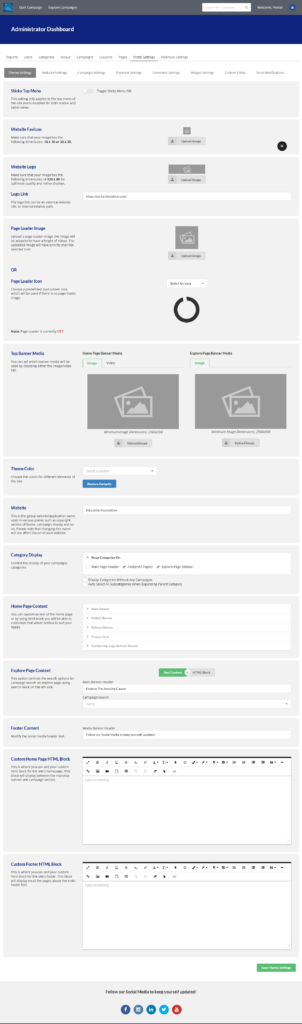
Fill out all of the necessary fields for your instance. Remember to save when you are finished with configuring the theme settings. To see your settings in action, you will also have to reload the page after saving the settings.
Step 3. Create the campaign to start accepting donations
First, we are going to configure the raise mode settings. Go to the administrator dashboard, click on portal settings, then click on the campaign settings tab. Next, scroll down to the section called “Campaign Raise Modes”

Here, you can set how you would like the transactions to be configured for the different raise modes. Learn more about different ways you can charge the backers by reading the following FAQ.
Once your settings are all configured for your campaign, it is now time to create your campaign!
Click on the “Start” button on the home page of your platform to begin creating a campaign. Simply fill in all of the necessary fields in the campaign creation steps for your campaign. When you are finished, click on the “Send For Review” button.

You will need to approve the campaign before you can start accepting the donations. Go to the administrator dashboard, and click on the campaigns tab. To approve the campaign, click on the dropdown that says “Being Edited” in the status column. Choose “Approved/Running“.
The following feature is optional to enable:
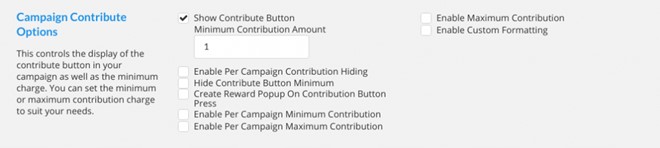
Campaign contribute options: You can configure the minimum contribution amount and other basic settings for the contributions. This feature can be found in the “Campaign Settings” area in the administrator dashboard.
Step 4. Donate to the campaign
Once your campaign has been created, you can make a test donation to the campaign to make sure it is working. To make a donation, go the campaign you have just created, and click on the blue “Contribute” button.

If you are using the test mode, you can use the following test cards to make pledges to your test campaign by going to this link.
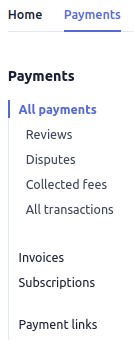
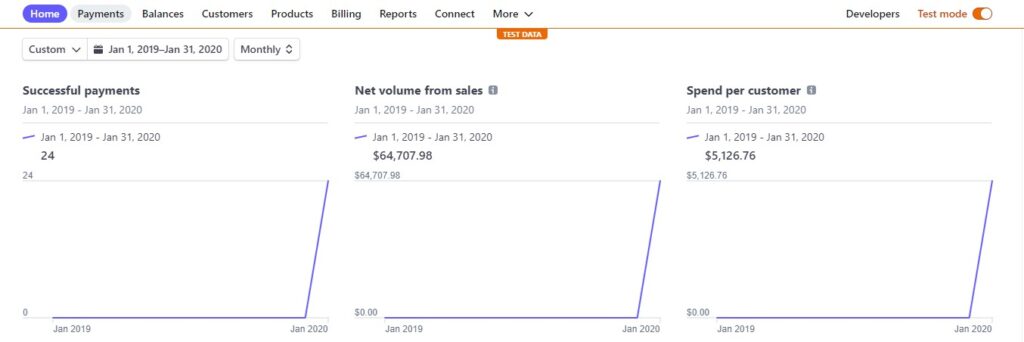
Once you have created the pledge, and you see the successful pledge UI you can make sure that the pledge was truly successful by logging back into the Stripe dashboard and clicking on the payments item in the top menu.
You can click on the payment to see more information.
Please note: you will not see the payment if you are using post processing mode for the campaign. If you would like to see the transactions right away, you will have to be using the direct transactions mode while contributing to a Keep it All campaign. You can read the following FAQ to learn more about troubleshooting the configuration of your payment settings. Those are the basic features and settings that you can enable on your platform. There are many more features that can be enabled for your unique instance. If you are experiencing any issues with the above steps or experience any other roadblocks, you can create a ticket in the Support system, or contact Lite Tuition at support@litetuition.com. Learn more by watching the following video.
Sometimes you may run into configuration issues with payment processing.
Please note that we do our best to help you with this including online help tutorials or assistance from our engineering team that can check or verify your payment configuration to ensure everything is correct.
Have you gone over the following tutorial below on how to configure the main Stripe account for your website instance?
Please make sure all the steps are followed in the above tutorial including creation of platform on Stripe.
Next, if you are planning to have project creator connect their stripe/bank account to campaign during campaign creation (like a kickstarter) for automatic distribution of funds, you will need to then follow the tutorial below.
Alternatively, you can use “Direct Transaction” feature if you will not be having project creators connecting their accounts and all money will go into portal account only as per below and you may handle distribution of funds manually.
That means you only need to do the connection once at the portal level and the funding step will be removed from campaign creation process.
https://litetuition.com/tutorials/introducing-direct-transactions/
Finally, if you are seeing customers created but not charges then your issue may reside with charge modes. Lite Tuition allows you to process payments in two charge modes.
1. Direct Charge Mode
or
2. Post Charge Mode
Defaults are for AoN type of campaign (All Or Nothing) that payments are processed in Post Charge Mode, and for KiA (Keep It All) type of campaigns that payments are processed in Direct Charge Mode.
These modes are configurable from the Administration Panel.
If you are indeed using AoN campaigns with Post Charges, then these should be tested as per tutorial below. Note that you will need to end the campaign so it can be tested (for this please refer to “Test Post Processing” option).
Direct Charges do not require this as they are processed immediately.
If you are still experiencing problems with your Stripe configuration, we will need to you to create a new support ticket on support.litetuition.com and invite our team to your Stripe account temporarily (you can remove us later). You can invite dev@litetuition.com and our engineer can examine both your Stripe and your Website Configuration to ensure there are no issues.
In order for this test to work, you must have an approved campaign with contributions/pledges.
STEP 1. Log in as the Portal Admin. Go to your ‘Administrator Dashboard’ and under the ‘Campaigns’ tab, select the campaign you want to test.
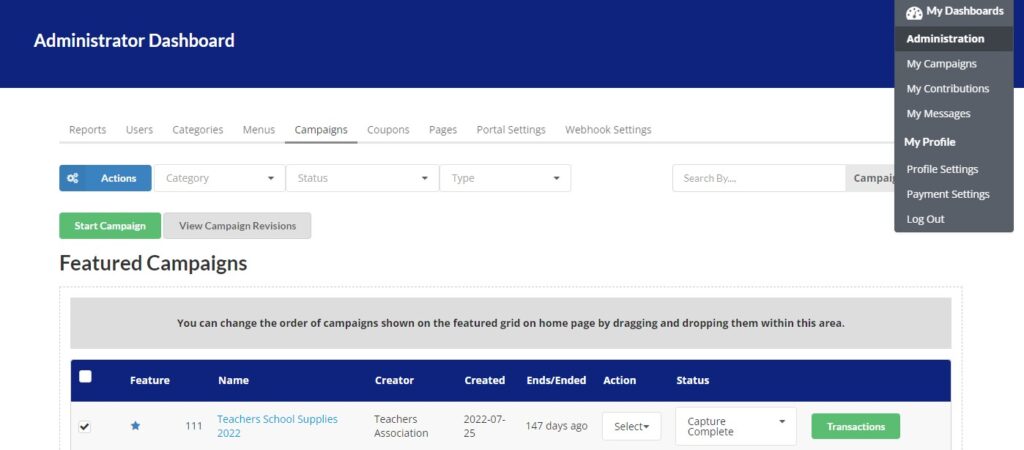
Checkmark the campaigns you want to edit with the check-boxes on the left of each campaign.
STEP 2. Click on the ‘Actions’ button at the top left to apply to the checked Campaigns. Click on ‘Test Post Processing’
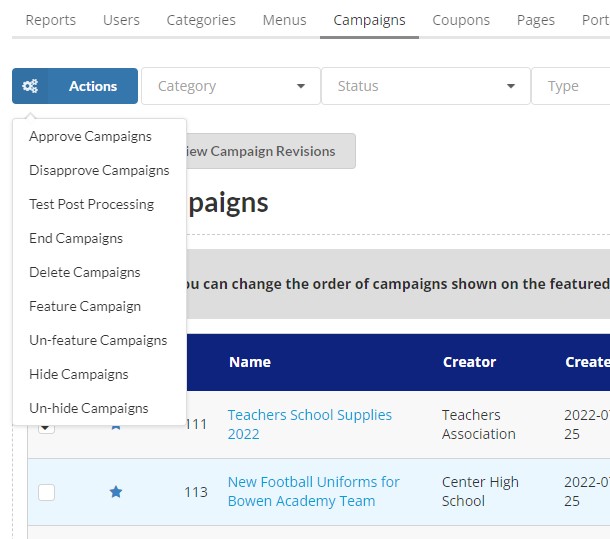
- Approve Campaign: Approve campaigns which are “waiting for approval”.
- Disprove Campaign: Reject a campaign or undo campaign approval.
- Test Post Processing: End a campaign, setting end date to -7 days. This is only used to test the Stripe Post Processing Script. Click this to test pre-authorization. (Please note: In LIVE mode, there is a 5 minute delay for the contributions to be processed for testing Post Processing. If there are transfers which are declined, you need to set the campaign status to “Accepted for capture” manually as the portal admin to capture the funds.)
- End Campaigns: End a campaign by changing the campaign end date to current time ( will need to wait a couple of minutes to update ).
- Delete Campaigns: Delete a campaign.
- Feature Campaign: Feature a campaign on the front page.
- Un-feature Campaigns: Remove a campaign from the Features List.
- Hide Campaigns: Hide the campaign from /explore and front page. To access the campaign, you will need a direct link.
- Un-hide Campaigns: Show the campaign again.
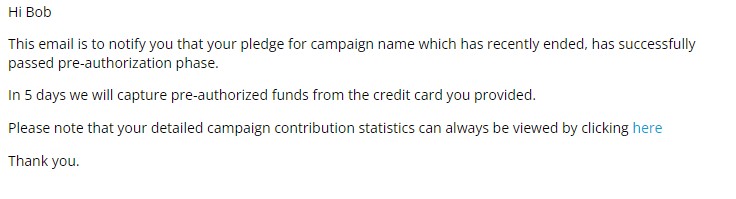
STEP 3. The system will automatically process the ended campaign and you will receive email notifications for each processing stage of the campaign.
STEP 4. You will now see your transactions on your Stripe dashboard.
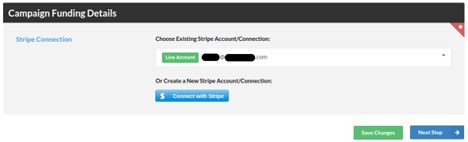
As a project creator you are now ready to create a campaign and connect your stripe account to your CrowdFunding campaign. Here are a few short steps showing how to do this.
STEP 1. Once you have created your campaign, head to the ‘Funding’ tab and click ‘Connect with Stripe’.
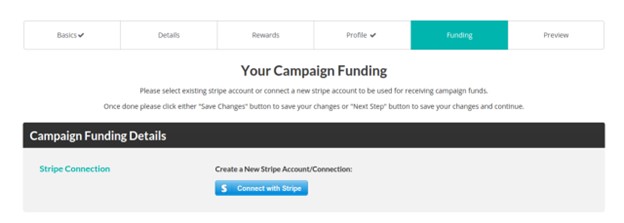
STEP 2. This will redirect you to Stripe, you will need to login if you haven’t done so or fill out the form. You can skip the form if you are in ‘Development Mode’ (you must be logged in to your stripe account as well).

STEP 3. Now you can select your stripe account in the drop down, based on the account email. Live and Test connections will be labelled.
STEP 4. Fill out the rest of the information for your campaign and after all fields are filled out, you can now send it for review.
Introducing Direct Transactions
“Direct Transactions” is a feature which allows for direct stripe connect transactions that portal admin can toggle.
Basically, this mode allows all the funds from campaigns to go to a single stripe account which is selected by the admin. Admin can then distribute the funds to campaign creators or managers manually.
By enabling this feature, campaign creators no longer need to go through the individual stripe setup (funding step) which greatly reduces the complexity for anyone who tries to setup a new campaign.
Following is a brief tutorial for helping site owners to locate and use the setting:
1. Go to ‘administration dashboard’ and then go to ‘Portal Settings’.
2. Under ‘Stripe Settings’, there is ‘Direct Transactions’. If that is toggled on, then all transactions will go to the main Stripe account configured on portal settings.
3. Save the settings and it’s good to go.
- Direct charge option will charge contributor’s credit cards and distribute the funds as contributions are received, (when using either Keep it All or All or Nothing raise modes).
- Post charge option will charge contributor’s credit cards and distribute the funds once the campaign end time is reached, (when using either Keep it All or All or Nothing raise modes). This option will not process charges when All or Nothing raise mode is in use and funding goal has not been met.
Please refer to the following articles for more information. New Raise Mode Payment Workflows (Direct/Post) and Post Processing Workflow Explained
This post will try to explain post processing workflow in more detail and outline some differences in regard to direct processing.
Campaign Processing Workflow
The post processing workflow offers several advantages over direct processing. However, there are always cases when either post or direct processing workflows make more sense. KiA campaigns can certainly benefit from Direct Processing and AoN campaigns are better suited for Post Processing. That is why these are the sensible defaults.
Imagine the following scenario. You had AoN campaign that had 100 contributors running in direct processing mode. If project ended and did not reach its goal or reached its goal but creator decided to back out, then project creator would need to refund those 100 backers manually.
However, if post processing mode was used then creator would not need to handle the refunds manually due to how post processing and credit cards work.
In post processing workflow what happens is as follows:
- Campaign ends at a certain date.
- If the campaign is successful (AoN) or under KiA mode, it moves into the special 5 day post processing phase
- Backend will try then to pre-authorize all credit cards to determine success rate and put fund holds.
- If there is a 100% success rate, it will automatically put campaign into capture phase (that occurs at end of 5 days), if not project creator or admin has to explicitly accept the campaign for capture by following the link sent in email or by changing campaign status manually to “Accepted for Capture” in administration panel (if administration account is used)
- If there is less than 100% success rate for pre-authorizations, project creator will get notified and also backers will get notified so they can re-try their pledges with new credit cards
- At any point project creator can back out of the campaign, however backers are not allowed to back out once they contributed, only project creator can back out.
- On the fifth day all pre-authorizations will get automatically processed as captures if the campaign has entered capture state as per #4
- If the campaign is canceled, project creator backed out, etc. then all pre-authorizations will automatically fall off after 6 days, so there is no need for manual refunds to be performed.
- The 5-day period gives enough time to project creators to determine the fate of campaign and also allows the backers to re-submit credit card information to ensure higher success rates
- Post processing mode is always a recommended mode for AoN campaigns.
Note that 5-day time period is a default time period and can be adjust to lower value if desired in the administration panel for the website.
The post processing workflow can always be tested immediately without waiting for 5-days.
Campaign Processing States
Once the campaign leaves the Approved / Running state ( campaign run time is finished ), the campaign is then going to enter final states as described below.
| State | Description | Outcomes |
| Finished – Processing Pre Authorization | This is when backend pledge processor will try to pre-authorize the pledges | Campaign will either be Accepted for Capture or Declined depending on 100% success of Pre-Authorization, Campaign Manager is notified |
| Finished – Accepted For Processing Capture | This is when backend pledge processor has pre-authorized the cards with 100% success rate | Pledge Processor will begin capture on all cards in 5 day period, Campaign Manager is notified and has option to cancel during this time |
| Finished – Declined For Processing Capture | This is when backend pledge processor has not been able to pre-authorize all cards with 100% success rate | Campaign Manager is notified and has option to cancel during this time or proceed with collection of whatever pledges are available in 5 day period |
| Finished – Processing Capture | This state is entered when pledges are ready to be captured, normally it occurs after 5 days of campaign being accepted for capture | Campaign Manager is notified that capture has started and status of campaign has changed accordingly |
| Finished – Capture Processing Complete | This is the final state of pledge processing which indicates that pledge capture phase is finished | Campaign Manager is notified that capture has finished and status of the campaign has changed accordingly |