New Raise Mode Payment Workflows (Direct/Post)
Due to demand from our users, we have introduced configurable payment workflows. Each Raise Mode (KiA or AoN) can now operate in either Direct or Post payment processing mode. This is configurable behavior from the portal admin UI.
With Direct payment processing mode contribution charges get processed immediately without any delays. This also means that the project or campaign creator needs to handle refunds manually.
Post payment processing mode (a sensible default) will process all contributions after the campaign has ended. It will first pre-authorize all credit cards used for contributions and then allow for those that failed to be re-tried. Additionally, it will give opportunity to the project creator to back out if success thresholds are not met. Refunds are handled automatically because if creators back out, pre-authorizations will fall off on their own. Finally, after a 5 day period those pre-authorizations will be captured if project creators did not back out.
Direct payment processing mode is preferred mode for KiA project or campaign creators. However, KiA can still be configured to use either Direct or Post payment processing mode.
Processing Webhooks

Webhooks is a feature that allows you to set callback URL’s (webhooks) for various background processing events.
For example, let’s assume you are post processing all your campaigns and you wanted to be notified of events that transpire when campaign and it’s transactions are being processed so that you could do some other post processing using such events within your own system.
Well you could accomplish that by first navigating to Administration Panel -> Webhooks -> Background Processor.
There (as depicted in screenshot below) you will see several URL’s that can be set for each type of events you want to listen for. Once set the processor will send the URL notifications automatically when there is new data available to process.

Event notification endpoints for Background Processor
- Process Ending Campaigns ( Endpoint URL for campaigns in ended state )
- Process Pre-Auth Campaigns ( Endpoint URL for campaigns in pre-auth state )
- Process Accepted For Capture Campaigns ( Endpoint URL for campaigns in accepted for capture state )
- Process Capture Campaigns ( Endpoint URL for campaigns in capture state )
- Process Cancelled Campaigns ( Endpoint URL for campaigns in cancelled state )
As campaigns transition through these event states appropriate callback URL’s will be invoked as set in the Administration Panel -> Webhooks -> Background Processor and your code can then execute to do something else.
The Callback URL will get JSON posted data with following main array keys.
“data” => Main Result Data
“error” => Any Processing Errors
“action” => Endpoint Action
“fingerprint” => Fingerprint or signature for the request so it can be verified
If you need to verify that requests are originating from your instance and not somewhere else then you can use fingerprint field. Simply take the fingerprint field which will come in the JSON callback request and send GET request

You can also update fingerprint by sending PUT request to the same endpoint with fingerprint and used parameter set to true or false. This marks fingerprint as used. Note that signed fingerprints auto expire after 3 weeks from when they are created. Once expired they are removed from system.
Endpoint event actions are outlined further as per below.
| Action Name | Action Description | Endpoint |
| process_ending_direct | Campaign finalized as direct charge detected | #1 |
| process_ending_preauth | Campaign updated to pre-auth state, post processing detected | #1 |
| process_preauth_campaign | State change on campaign | #2 |
| process_preauth_transaction | Pre-auth performed on transaction | #2 |
| process_accepted_capture_campaign | State change on campaign | #3 |
| process_capture_campaign | State change on campaign | #4 |
| process_capture_transaction | Capture performed on transaction | #4 |
| process_cancelled_campaign | State change on campaign | #5 |
Event notification endpoints for Campaign
- Pledge Operations ( Endpoint URL for campaign pledges )
| Action Name | Action Description | Endpoint |
| pledge_create | Create campaign pledge | #1 |
| pledge_update | Update campaign pledge | #1 |
| pledge_delete | Delete campaign pledge | #1 |
NOTE: All event actions will result in either sucess or failure as indicated by the “error” structure returned. Also consider using HTTPS callback URL’s for increased security as information will be transmitted in encrypted form.
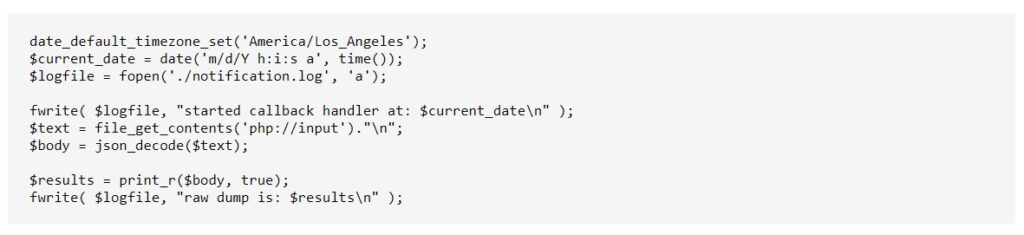
Below is example PHP code which can be used to listen for events on your side. You can however write such code in pretty much any modern language such as Python or Ruby.
Email Notifications and Templates
In this short tutorial, we will show how to use and adjust each email template found in the Email Notifications tab in the Administrator Dashboard.
Toggling the Email Notifications

You can toggle (using the toggle button on the right) which email notifications you want to allow. The next step will show you how to configure the message themselves.
Customizing the Email Templates
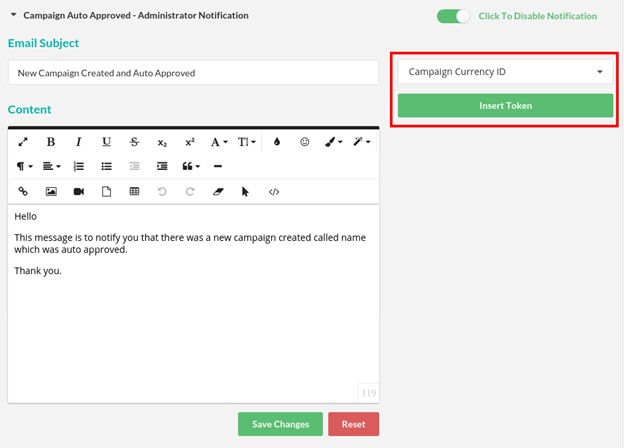
Using the built-in text editor, you can edit the content of the emails. On the top right, you’ll see the token system we’ve implemented which allows you grab details exclusive to that campaign. Just choose a value from the dropdown, and click “Insert Token”. This will insert that token in the position of your text cursor.
Check the screenshot below for the highlighted example.

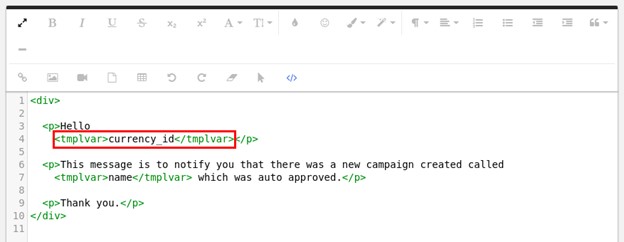
To make sure this is all working correctly please make sure to switch the froala editor to the code view (using the code view button on the toolbar) and check that your token is wrapped with <tmplvar>. Wrapping it with <tmplvar> interpolates the tokens and without this there will be issues.
Please note: You can only insert <tmplvar> through the code view.
Check screenshot below for an example.
Email Notification Table
Here is a table showing when each email notification is sent (i.e. under what conditions).
| Email Title | Sent Condition |
| Campaign Approved | When a campaign is approved manually |
| Campaign Auto Approved | When a campaign is created and automatically approved ( toggle in the settings ) |
| Campaign Cancelled By Administrator or Manager | When a campaign is cancelled |
| Campaign Currently Being Finalized | When a campaign is the Finalized step during Post Processing |
| Campaign Not Approved | When a campaign is not approved |
| Campaign Sent For Review | When a campaign is sent for review |
| Campaign Review Submitted | When a campaign is sent for review |
| Change Email Request | When an email change request is sent |
| Contact Form Submit | When the contact form has been submitted |
| Forgot Password | When a Forgot Password request has been sent |
| Inline Account Registration | When a new account has been registered |
| Campaign Pledge Direct Processing | When a pledge is made to a Direct Processing campaign |
| Campaign Pledge Post Processing | When a pledge is made to a Post Processing campaign |
| Pledge Processor – Campaign Capture Completed | When a campaign Capture process is completed |
| Pledge Processor – Campaign Capture Started | When a campaign Capture process is started |
| Pledge Processor – Campaign Finished | When a campaign has ended |
| Pledge Processor – Campaign Pre Authorization | When a campaign has passed or failed the Pre-Authorization process |
| Account Reconfirmation | When a re-confirmation email is sent to new accounts |
| Account Registration | When a confirmation email is sent to new accounts |
| Campaign Stream Update | When a campaign Stream is updated |
Campaign Revisions Toggle
The campaign revisions toggle is designed to allow admins and campaign managers to update the campaign while it has already started. The toggle, however, can cause issues with the campaign among other features on the website due to its complexity.
We warn anyone who decides to use this toggle and would recommend that if you run into any minor issues on the platform, to turn this toggle OFF and see if it will fix it.
Enabling alternative layouts for your crowdfunding site

Please note that when you are enabling some of these special toggles/configurations for alternative layouts in the admin dashboard that they will alter the default layout to a custom layout.
Sometimes you may think it is broken or something doesn’t look right but this is a default template to start with which will require further CSS customization to make it look the way you want it.
If you do not want this, then make sure not to use some of these special toggles and make sure they are turned off.
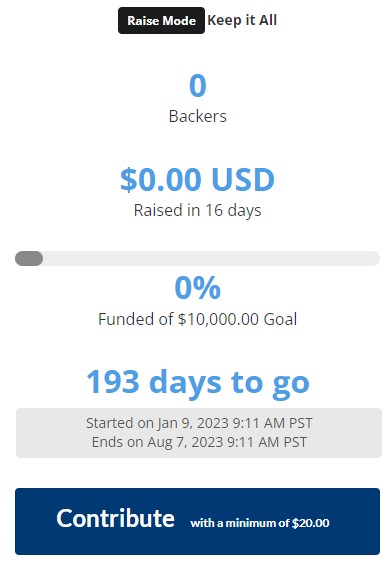
If you look at the screenshot below, the toggle called “Display simple verbal campaign pledge info” will toggle an alternative layout
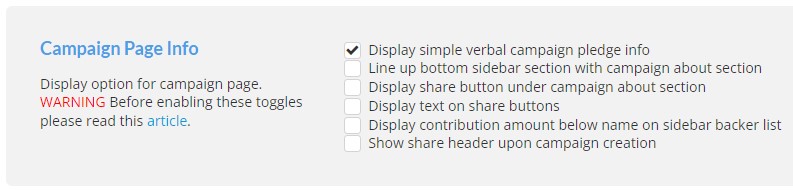
An example below is provided when you start using the alternative layouts.
Toggle Disabled (Default layout with default styles):
Toggle Enabled (Alternative layout without custom style):
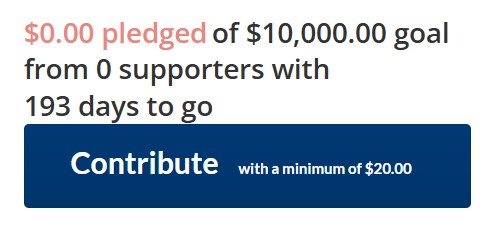
Now that you’ve seen what these toggles will do, you may require additional custom css to be added on your site to suit your theme.
How to Enable the Advanced CrowdFunding Widget for Your Website
In this tutorial, we will show you how to enable the Advanced CrowdFunding Widget for your website portal so that you can offer it to the users of your website.
Advanced CrowdFunding Widget allows the website campaign creators to copy and paste small HTML code snippet anywhere on their website and host the campaign directly on that website.
First navigate to your CrowdFunding Website Administration Panel and click on Portal Settings. Then follow the steps below.
Step 1. Click on Website Settings: Enable the Widget
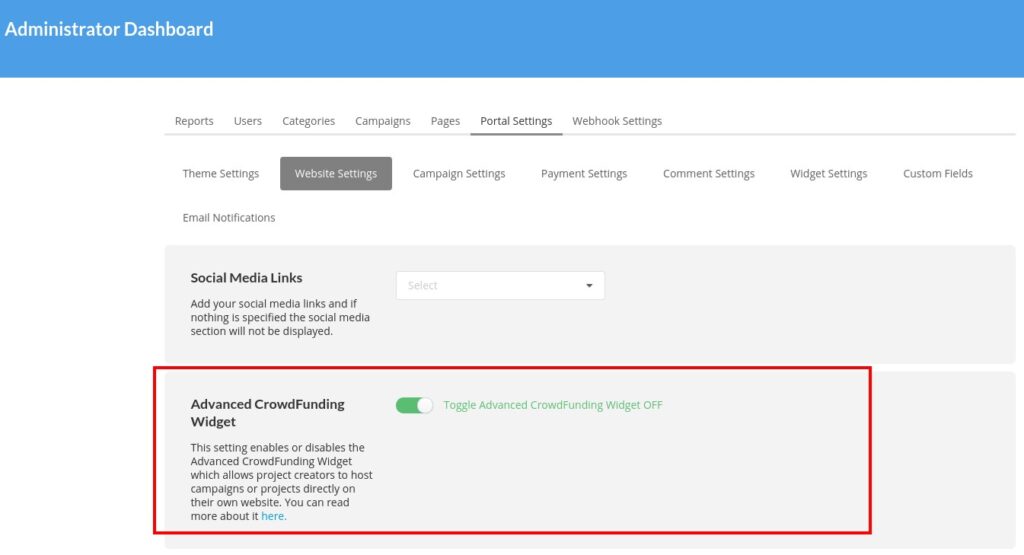
IMPORTANT: Make sure to have this setting toggled ON
Step 2. Campaign Creation: Widget Step will be added
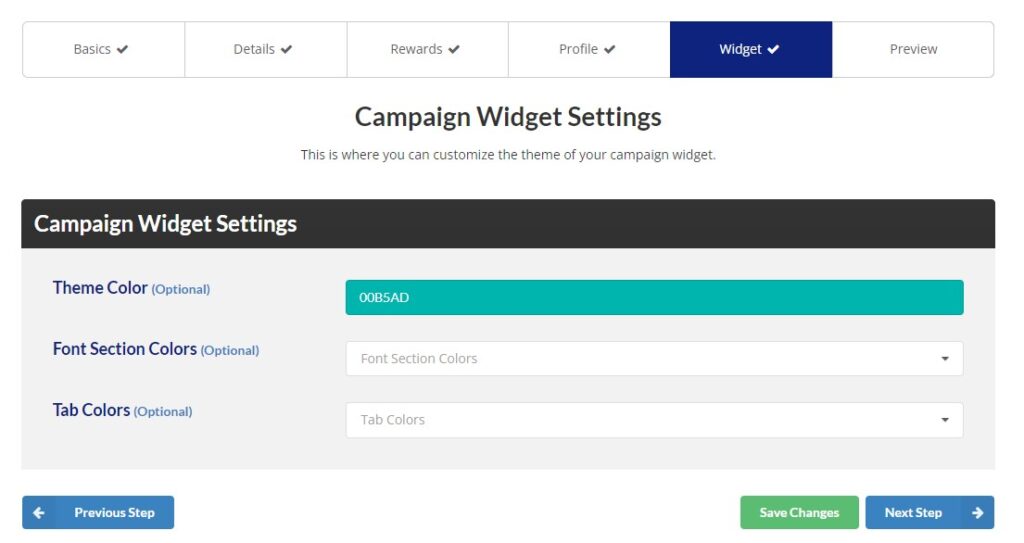
Note the Widget tab that is added. Here you can adjust the general theme and font colors for the widget.
Step 3. Campaign Preview
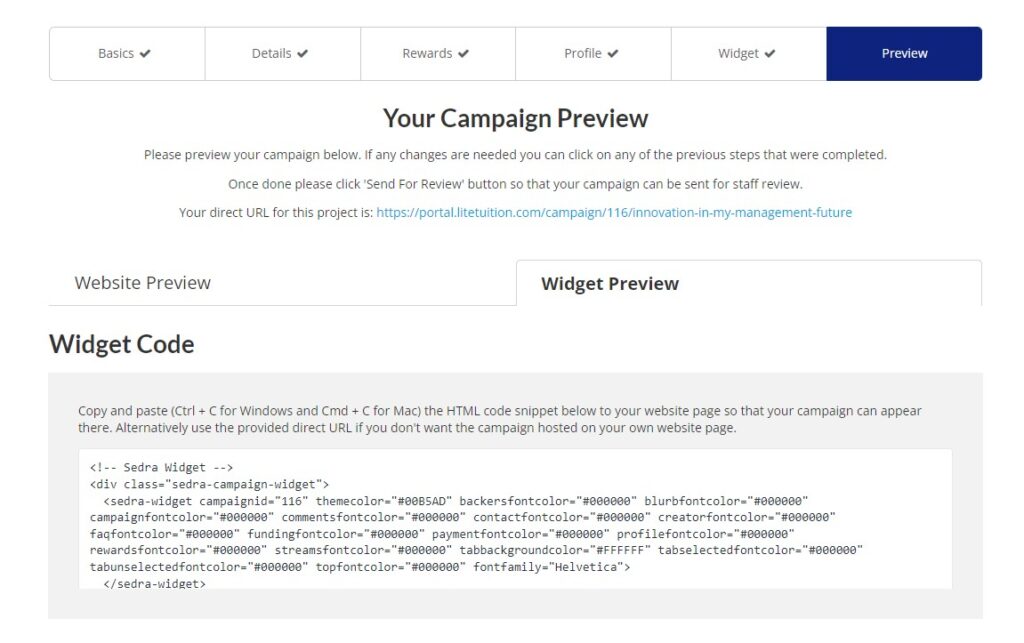
A new tab for the previews will be added. You can switch between the normal campaign preview ( Website Preview ) and the new widget preview ( Widget Preview ).
To embed the widget on any website, just follow the instructions and copy/paste the small code snippet to your target website where you want the widget to show.
Using Okta for Social Sign On

Do you want your users to sign into your Lite Tuition platform via an identity provider that they may already be using such as Facebook, LinkedIn, Google, Apple, Microsoft, and Okta? This tutorial is going to cover how to set up Okta the SSO (Social Sign On) feature on the Lite Tuition white label platform.
Okta is the identity provider service that you will need to use in order to add the identity providers as mentioned earlier. This will be mandatory to sign up for and set up if you would like to be using the other providers to sign into the platform.
Step 1. Sign up for Okta
Go to developer.okta.com to sign up for a new account. Be sure NOT to sign up for an okta.com account as the pricing for these accounts is different and will also provide a different dashboard user interface.

Step 2. Enable the Okta feature
Log into your Lite Tuition platform as a portal admin and do the following:
Go to the admin dashboard –> Portal Settings –> Website Settings –> Social Login –> Enable Social Login.
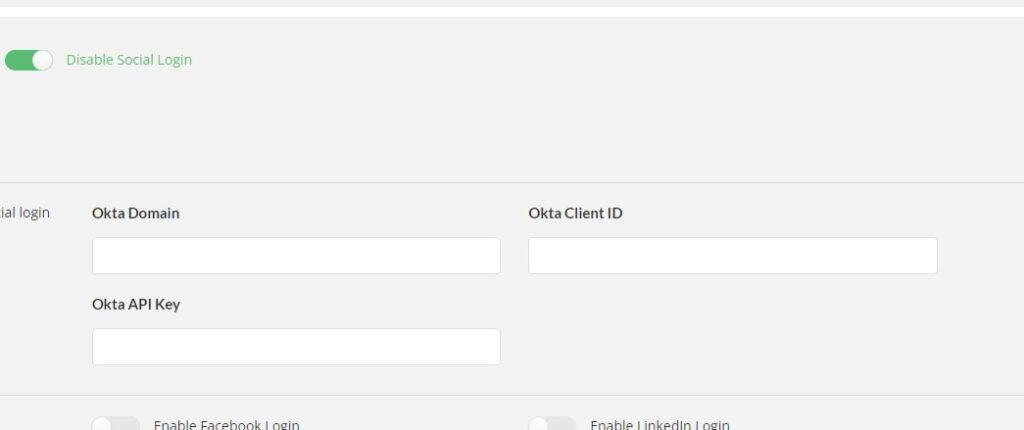
As you can see, you will need to paste information into the fields as shown above in order to connect with Okta and enable this feature.
Step 3. Create a new application on Okta
Once you have created the developer Okta account, you will need to create a new application on Okta. Simply log into Okta and go to the admin dashboard. Next, click on Applications.
Applications option in the left menu
You can create the new application by clicking on the blue Add Application button.

Add application
You will be directed to another page. On this page, click on the blue Create New App button in order to create the new app.

Create New App
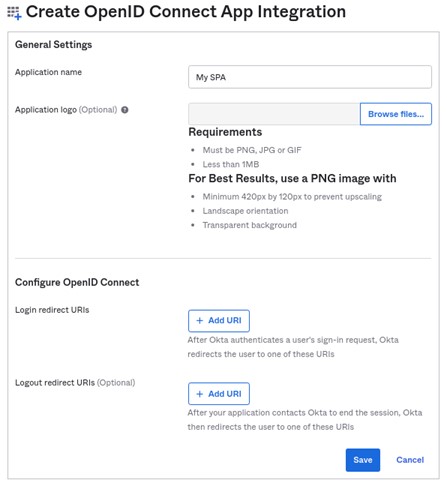
You will then need to choose the type of app that you want to create. Choose Single Page App (SPA).
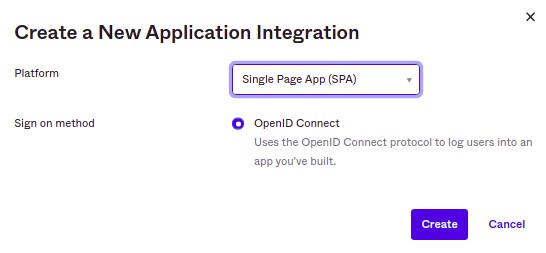
Now that you have created the new app, you will need to add the correct Login/Logout URI’s. This will be your Lite Tuition Platform URL, for example, if your platform is hosted on https://platform.litetuition.com then you should add this URL.
Step 4. Add the Client ID and Okta Domain into your Lite Tuition Platform
Now that you have created a new SPA, paste both the Client ID and the Okta domain into the Lite Tuition Platform social login settings.
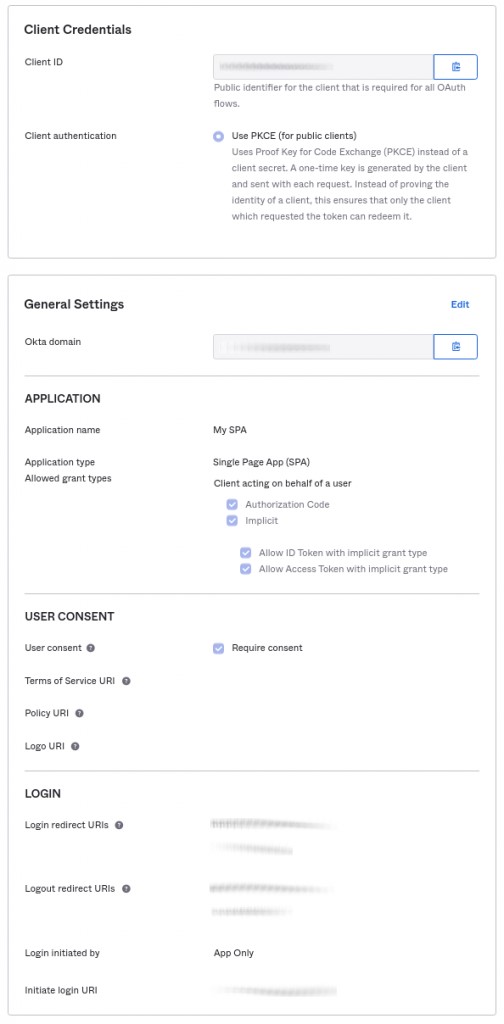
Application UI
First, you will need to copy the Client ID and paste it into the Atlas dashboard.
Once you have done that, you can then copy the Okta domain and paste it into the Atlas dashboard.
PLEASE NOTE that you will need to include https:// when pasting the Okta domain into the Lite Tuition dashboard.
Step 5. Create and paste the new API token
Now that you have the client ID and Okta domain added into the Lite Tuition dashboard, you will need to add the API token from Okta. To do this, go back to the Okta admin dashboard.
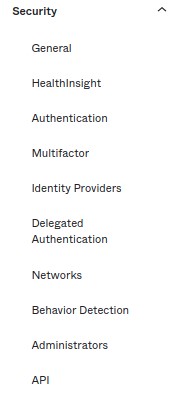
Click on the Security item in the left menu, then click on the API option.
Click on the Tokens tab, then click on Create Token button.
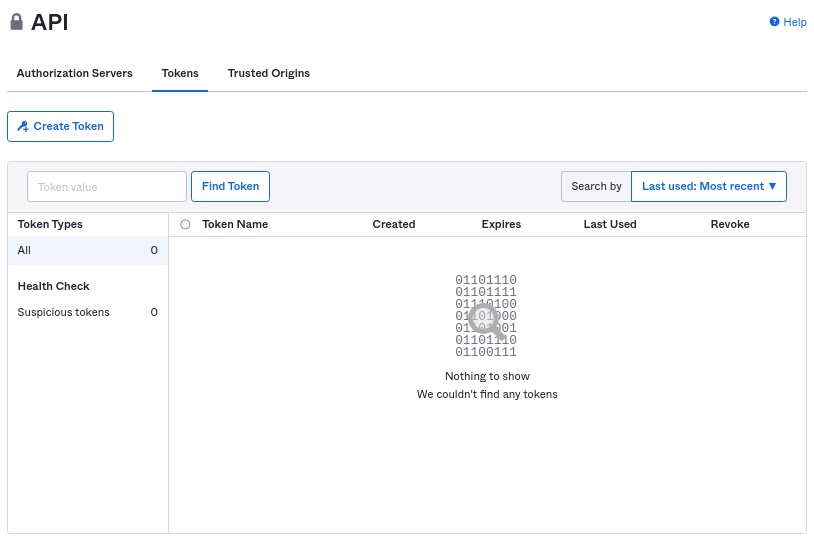
Add a name for the new token.
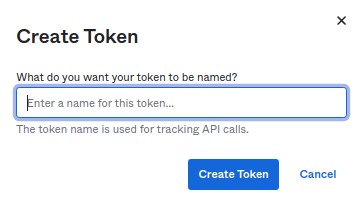
You will be presented with the one-time API Token. Copy this and paste it into the Lite Tuition dashboard.
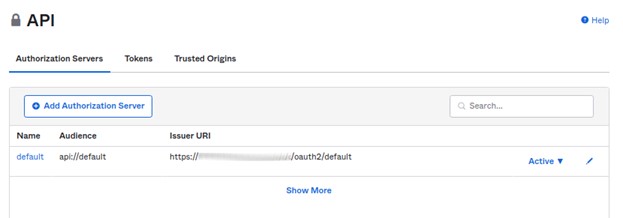
PLEASE NOTE if you have a custom login URL for Okta, you will need to make sure that this custom login URL is reflected in the issuer area when going to Okta API –> Security –> API –> edit the default API (click on blue pencil icon) –> Issuer URL. If you have not created a custom URL for Okta login then this does not apply to you.
Step 6. Adding Claims
Since you are already on the API page, click on the Authorization Servers tab, then click on the edit button (blue pencil icon).
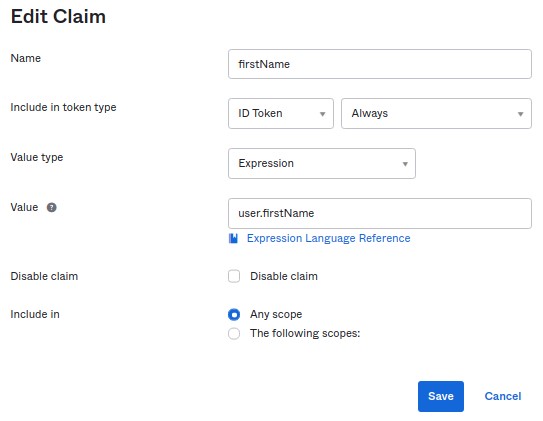
Next, click on the Claims tab, then Add Claim.
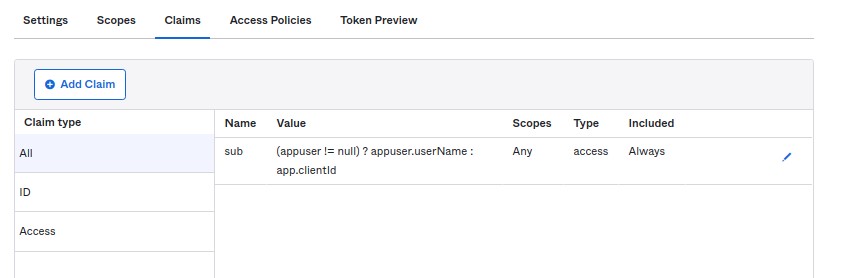
You will need to add 2 claims. The first name and the last name. Please see the below screenshots for the correct configuration.
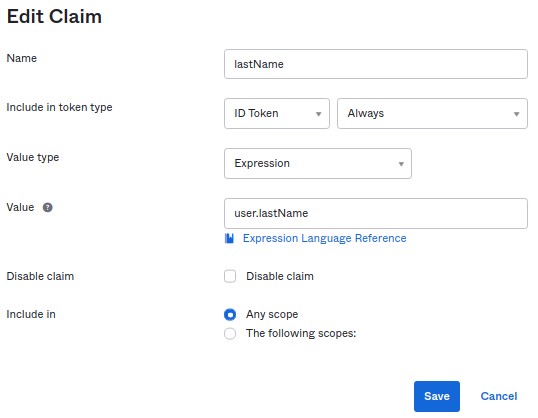
Remember to save the claims.
Step 7. Adding groups
You will need to add the users that you would like Okta to be using for the app. In this example, we will be using everyone. Go back to the SPA app by clicking on the applications item, the left menu.
Then click on the assignments tab. Here you can assign users to the app.
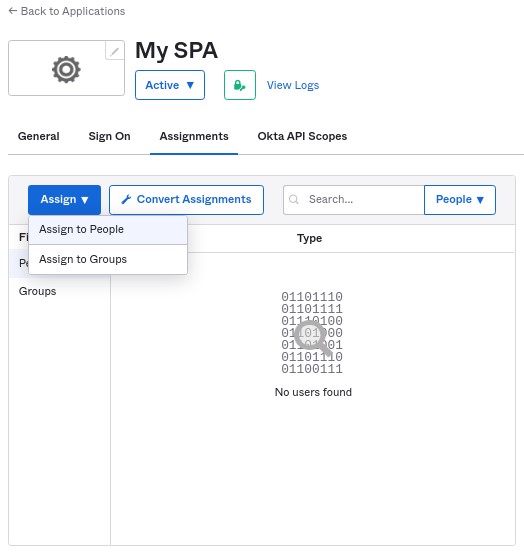
Choose Assign to Groups, then click on the Assign button to assign everyone.

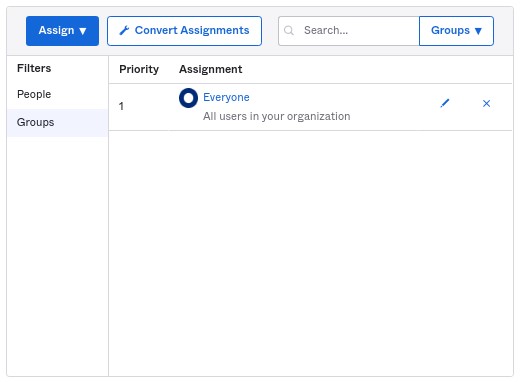
That’s it! You have now connected Okta to your platform.
Now that you have followed the above steps and have successfully connected Okta to your platform, you can try adding one of the following identity providers:
In this tutorial, we will cover how to set up your stripe account and connect it to your crowdfunding site.
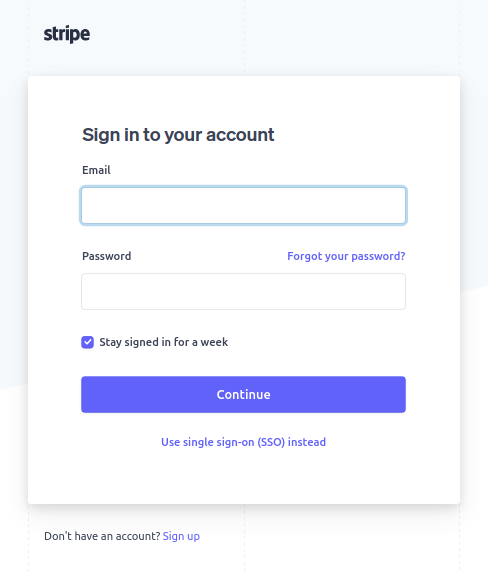
Step 1: Create a Stripe account
Step 2: After logging in, access your API Keys
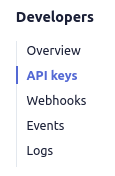
Go to the Stripe Dashboard and click on the Developers option at the top right corner of the page.
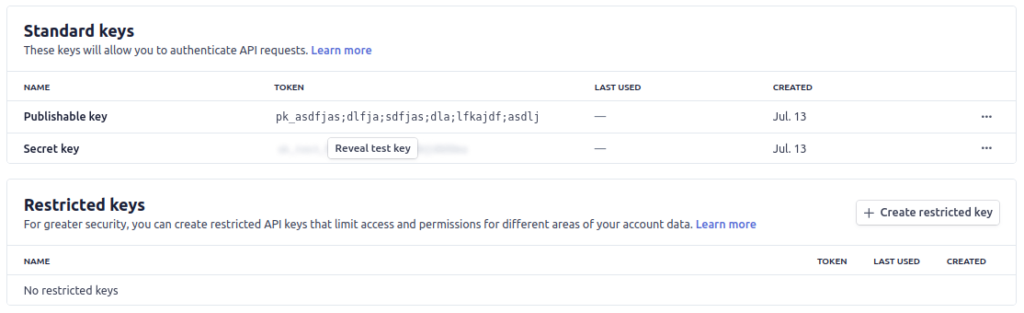
You will see a set of keys. To switch between TEST and LIVE keys, toggle the “Viewing test data” on the side. TEST keys are used for testing (Test Secret Key and Test Publishable Key) and the other for the actual live transactions (Live Secret Key and Live Publishable Key).
Note: If you want to use live data you have to make sure that you have activated your account. You will need to also fill out a form to connect your bank account.
Step 3: Copy and paste your API keys to your crowdfunding platform. It is located under Administrator Dashboard > Portal Settings > Payment Settings tab > Secret/Publishable key fields.
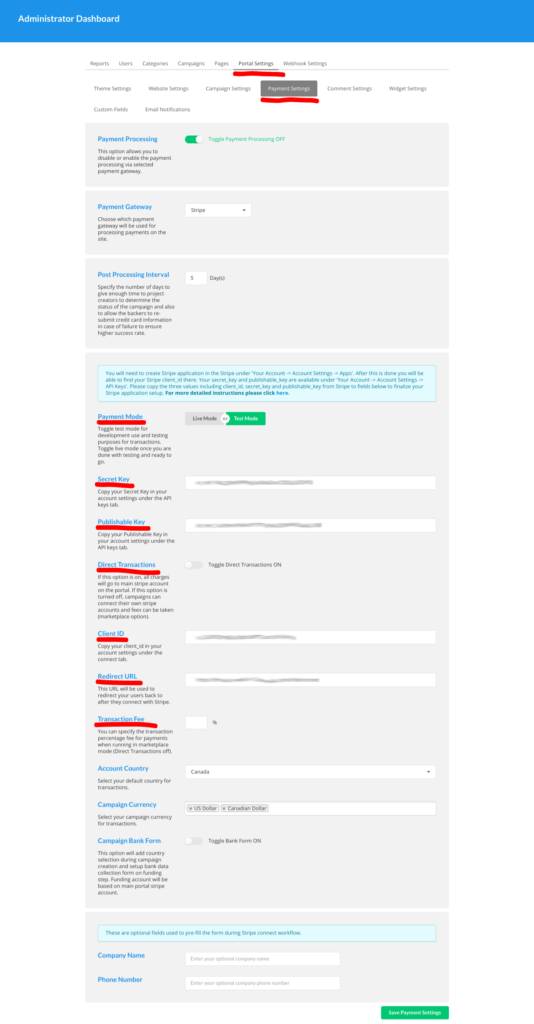
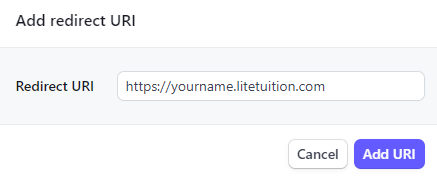
Step 4: Go back to your Stripe dashboard, add a redirect URI and copy/paste your Client ID to your platform.
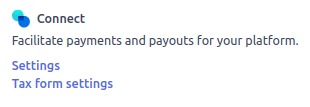
Click on the gear icon in the top right corner of the screen. In the Stripe admin dashboard, then scroll down and click on the connect settings. Make sure you turn the OAuth for Standard accounts setting ON.
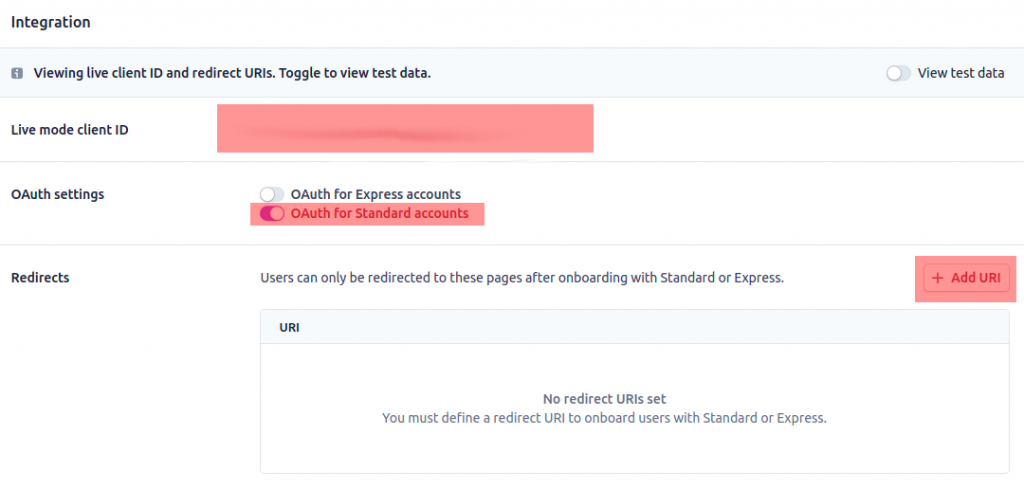
Copy the Redirect URL that is shown in the payment settings page:

Also, don’t forget to copy your Client ID and paste it back to your crowdfunding platform’s payment settings as shown on the screenshot below.

Once these steps are done you are all set and ready to go!
Do you want to use PayPal to accept payments on your CrowdFunding platform? If so, this tutorial will show you how to set up and configure PayPal payment gateway for your CrowdFunding instance.
PLEASE NOTE that currently you are not able to use marketplace mode when configuring the platform to be using PayPal as the payment gateway. This means that all of the donations on the platform are going into one single PayPal account. If you would like to use marketplace mode, please read this blog article.
Let’s get right into the steps!
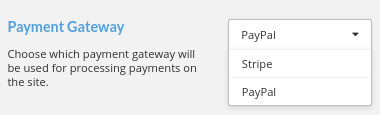
Step 1. Go to the payment settings and choose PayPal in the dropdown
Log into your platform as a portal admin and go to the admin dashboard –> Portal Settings –> Payment Settings –> in the Payment Gateway section, choose PayPal in the dropdown.
Step 2. Create the PayPal account
In this configuration, you will need to use a Business PayPal account to connect your account to the platform.
For this tutorial, we will be using a sandbox account in order to test the transactions without using any real money. You can also create a sandbox account if you would like to test the payments first before using a live account. You can create a sandbox account using the following URL: https://developer.paypal.com/
Step 3. Retrieve and paste the Client ID and Secret Key
Once you have created an account, you can log in and go to the accounts page. You will want to view the details for the account. Hover over the 3 dots and click on View/edit account.
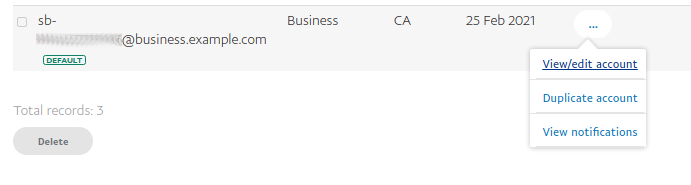
Go to the API Credentials tab for the account, then click on the Default Application link.
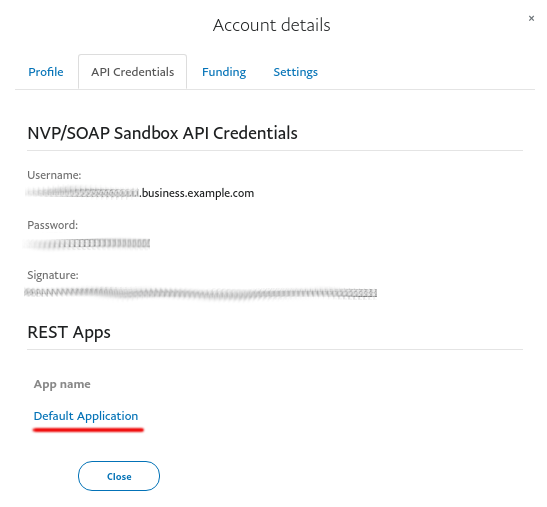
Here, you can see the Client ID and Secret Key to add in the Payment Settings in the Atlas admin dashboard.

You can paste these values into the correct fields.
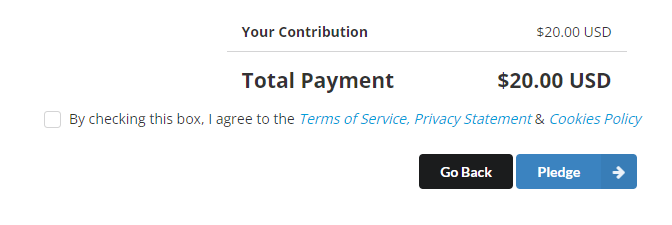
Step 4. Save the settings and test the payments
You can now save the Payment Settings in the admin dashboard and create a new campaign to test the transactions on the platform. When contributing, the user interface should look something like this.
If you are using a test account, you can only pledge using one of the sandbox accounts that you have. So you can go back to the accounts interface that you navigated to earlier in step 3, and click the View/edit account link for the account that you want to pledge with. If you would like, you can also create a new account to pledge with on that same page. When you click on the View/edit account button, you will see there is a Funding tab. In this funding tab, you can see the credit card information to add when making a test pledge.
Once you have made a successful pledge, be sure to check that the pledge has been captured into the correct account.
You will need to log into the account that is connected to the platform via the following link if you are testing: https://www.sandbox.paypal.com/
You should see that the pledge has been captured successfully.
PLEASE NOTE that you cannot use post charge with PayPal, so you will be capturing all donations instantly, without delays, into your PayPal account as soon as the donor makes a pledge.
That’s it, you can now accept donations via PayPal!
Portal Admin – Administration Dashboard Tutorial
This blog post will teach you about some the functionality and provide an overview of how to use the Administrator Dashboard.
- Once you have logged in as Portal Admin you can click on the icon in the top right corner. This will open up the My Dashboard menu, click on Administration.

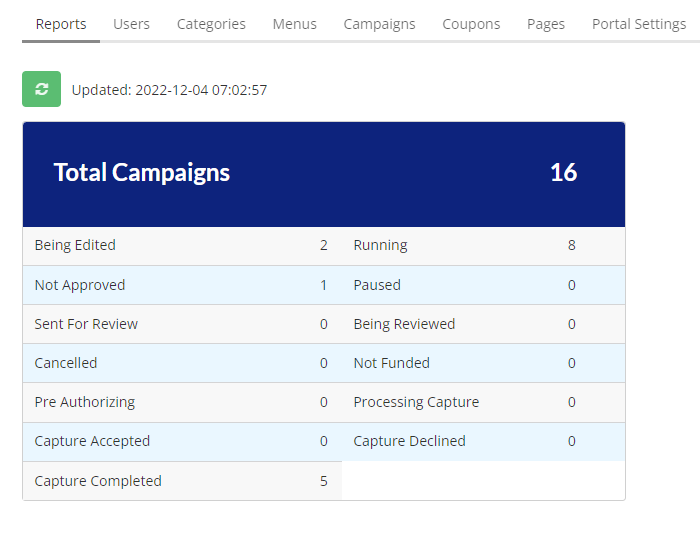
- Once you have entered the Administrator Dashboard you will see several tabs near the top of the page, the first being Reports.
Users
In the Users tab you can view all of the users that have accounts on your site.

- You can filter through users by clicking on and selecting an option from either of the two drop down menus or search by name or email on the far right.
- To add a user click on the Actions button and then select Add User from the drop down menu. An Add User form will pop up, fill it out with the new user’s information.
- To delete or approve a user you can click on the user’s check box on the left and then click on the Actions button. Select Delete Users or Approve Users from the drop down menu.
- Click on the Edit button on the far right to update a particular user’s information.
- Click on the Export to CSV button at the bottom of the page to download a spreadsheet list of all users.
Categories
In the Categories tab you can view all of the categories on your site.
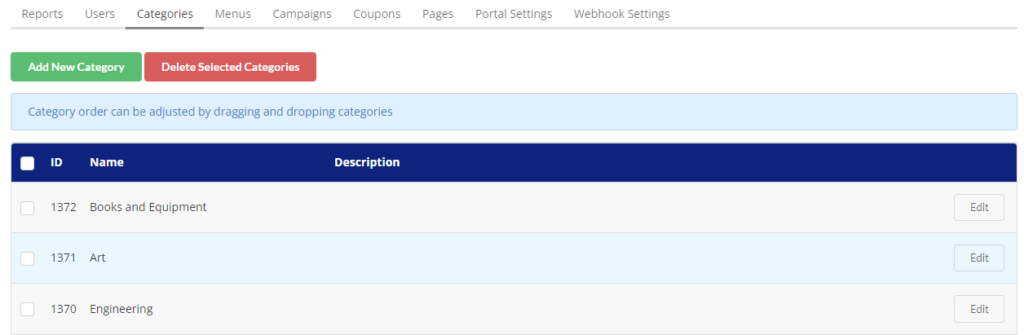
- To add a category click on the Add New Category button and fill out the form that pops up.
- To delete a category click in the check box beside the categories that you would like to delete, and then click the Delete Selected Categories button.
- Click on the Edit button on the far right to update the name and description of any particular category.
- You can change the order in which categories appear by clicking and holding down on a particular category row, drag and drop it into the appropriate place in the list.
Campaigns
In the Campaigns tab you can view all of the campaigns that are on your site.

- You can filter through campaigns by clicking on and selecting an option from any of the three drop down menus or search by the campaign name on the far right.
- The Actions button has a few options for updating any particular campaign, (Approve Campaign, Delete Campaign, Feature Campaign, etc.). Click on the campaign’s check box on the left and then click on the Actions button. Select one of the options from the drop down menu.
- You can change the order in which campaigns appear by clicking and holding down on a particular campaign row, drag and drop it into the appropriate place in the list.
- In the table under the Action column you can select Edit from the drop down. This will bring you to the Campaign Basics page. From here you can view and update the selected campaign’s Details, Rewards, Profile, Funding and Preview. This blog post explains how to create or edit a campaign: Create a Campaign Tutorial.
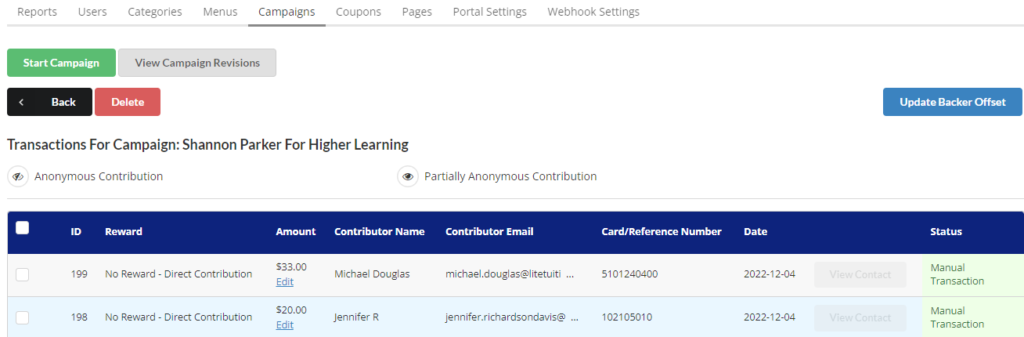
- Click on the Transactions button on the far right to view a breakdown of funding transactions for a particular campaign. Click on the Export to CSV button at the bottom of the page to download a spreadsheet list of all transactions.
Pages
In the Pages tab you can view a list of the website pages that are on your site.
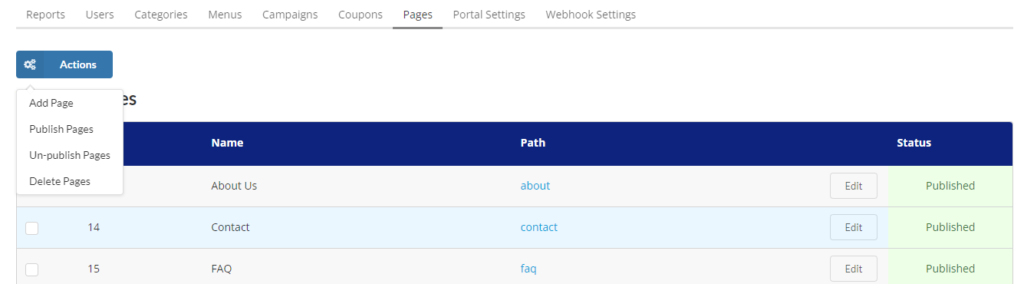
- To add a page you can click on the Actions button and then select Add Page from the drop down menu. An Add Page form will pop up. Fill out the input fields and add content below. Click the Save Page button once you are done editing.
- To publish, un-publish or delete pages click on the user’s check box on the left and then click on the Actions button. Select Publish Pages, Un-publish Pages or Delete Pages from the drop down menu.
- Click on a link in the Path column to view the page. Click Edit on the right to update a page.
Portal Settings
Portal Settings is the last tab in the Administrator Dashboard. We will cover Portal Settings in the separate blog post: Portal Admin – Portal Settings Tutorial.
- « Previous
- 1
- 2
- 3
- Next »